
Planner is an easy-to-use to-do and to-do list management tool that includes built-in support for Todoist and CalDav.

Planner is an outstanding task management tool with GitHub integration available for Linux, macOS, and Windows. The app is simple and lets you create multiple projects, add tags, use a pinboard, and view a timeline for your tasks.
SEE: Recruitment Kit: Project Manager (TechRepublic Premium)
Although quite basic, its simplicity makes Planner a refreshing app to use. Instead of weaving your way through too many features or a complicated workflow, Planner is quite simple and simplistic.
While Planner’s feature list won’t blow you away, it does include:
- Reminders and Notifications.
- Rapid search.
- Night mode.
- Recurring due dates.
- Swipe and order.
- Progress indicator for each project.
- Sync projects with Todoist.
- CalDav support for to-do list synchronization.
Let me show you how to install Planner and integrate it with your Todoist account.
Jump to:
What you’ll need to connect Planner and Todoist
The only things you’ll need for this are installing Planner (instructions below) and a valid Todoist account. You can use a Free or Pro Todoist account, as the Planner feature works with both.
Let’s go.
How to install the scheduler
Believe it or not, the easiest operating system to install Planner on is Linux via Flatpak.
Install Planner on Linux via Flatpak
This is done with the following steps:
- Open a terminal window.
- Download the flatpakref planner file with the command
wget https://dl.flathub.org/repo/appstream/com.github.alainm23.planner.flatpakref. - Install with
sudo flatpak install com.github.alainm23.planner.flatpakref. - Once the installation is complete, close the terminal.
- Log out and log back in to your desktop.
Installing Planner on macOS
On macOS, you need to do the following:
- Install Xcode and the Xcode CLI Tools.
- Install Mac Ports*.
- Install Planner with the command
sudo port install planner.
*There are MacPorts pkg installers for Ventura, Monterey, Big Sur And Catalinawhich is the easiest method of installing MacPorts.
Installing the scheduler on Windows
For Windows, you need to install the Windows 11 WSL2 GUI application. You will then need to follow these instructions to install Flatpak:
Open the Windows terminal in the administrative role.
- Issue the command
wslconfig /u ubuntu. - Update WSL with
wsl --update. - Restart WSL with
wsl --shutdown. - Install WSLg and a new Ubuntu environment with
wsl --install -d Ubuntu. - Install Flatpak with
sudo apt install flatpak.
You can now install Planner on Windows by following the same instructions given for the Linux installation.
How to integrate Planner and Todoist
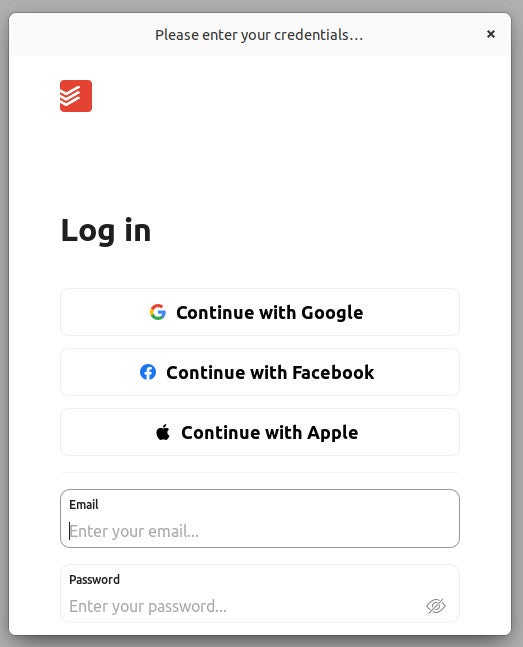
Open Planner from your desktop menu and you’ll be greeted with a welcome page where you can start the Todoist integration. Click Todoist, and when prompted, select your sign-in method (Figure A).
Figure A
Once logged in, you can start using Planner with your built-in Todoist account (Figure B).
Figure B
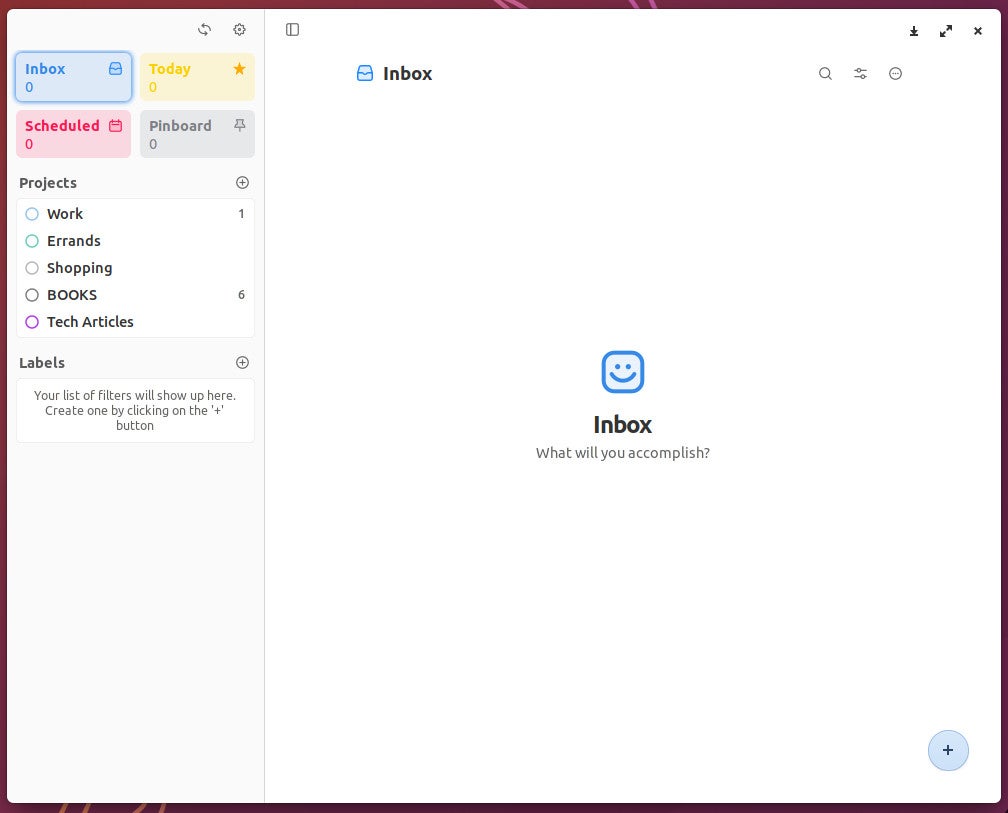
As you can see, I have five different projects that were imported from Todoist. I can add new projects, add tasks to those projects, add tags, search and filter tasks.
A convenient connection between two convenient applications
Todoist is already a great task management app and service. But when you combine it with the well-designed simplicity of Planner, it will make your workflow even easier.
One thing to remember is that once you connect Planner to Todoist, that’s your workflow. You cannot have both a local instance and a Todoist instance. The good news is that connecting Planner to Todoist is the way to go with this app, so get a free Todoist account and connect it to Planner for a convenient workflow.
Subscribe to TechRepublic How to make technology work on YouTube for all the latest tech tips for professionals from Jack Wallen.